> ## Documentation Index
> Fetch the complete documentation index at: https://sequence-0fb8d9e6-api_docs.mintlify.site/llms.txt
> Use this file to discover all available pages before exploring further.
# How to Deploy a Soulbound Token Contract in Sequence Builder
> Learn how to deploy Soulbound Token contracts in Sequence Builder for non-transferable, exclusive game assets. This guide covers setup, key steps, and best practices for deploying non-tradable NFTs.
Discover how to set up and deploy Soulbound Token contracts in Sequence Builder. Soulbound Tokens are perfect for creating unique, non-transferable game assets, including Battlepasses, memberships, and exclusive in-game items that stay permanently with the player.
## Overview of Soulbound Tokens
Soulbound Tokens (SBTs) are non-transferable, non-sellable on-chain assets designed to provide exclusive, enduring value in Web3 environments. Since they cannot be transferred or traded, SBTs are ideal for representing permanent, achievement-based, or membership-related digital items. Here are some common use cases:
* **Game Passes and Memberships**: Use Soulbound Tokens for Battlepasses, memberships, or loyalty programs that stay permanently in a user’s wallet, ensuring exclusive access for the intended holder.
* **Achievement Badges**: Reward players with unique achievement badges that serve as a testament to their progress and accomplishments, visible to all but non-tradable.
* **Event Tickets and Certifications**: Provide secure, non-transferable tickets for exclusive in-game events or educational certifications for skills achieved within a game environment.
* **Identity and Reputation Systems**: Establish identity-based or reputation-based tokens that signify trust or credibility, supporting fair-play and user engagement.
Soulbound Tokens are especially beneficial for game developers and communities aiming to provide lasting value without the need for speculative trading.
Prerequisite: Create a Project
This guide assumes that you have already [signed up for Builder and created a Project](/solutions/builder/getting-started).
## Step 1: Navigate to contracts
Start by selecting your `project` in the top left corner for which you want to create the collectible, then go to the `Deploy` section, select `Contracts`, and select the `Contracts` button to add a new contract.
## Step 2: Choose your collectible type
Select either Web3 Game Item Collection (ERC1155) or NFT Collection (ERC721) for your Soulbound Token. For this guide, we'll walk through a Web3 Game Item Collection (ERC1155), ideal for creating non-transferable Soulbound Tokens.
## Step 3: Specify contract details
Provide details for the contract by specifying a `Contract Name` and `Owner`. You also have the option to set Royalties. Ensure that the Owner address matches the Sequence Wallet in the top-right corner, with adequate funds in this wallet on mainnet. For testnet transactions, we sponsor them for you.
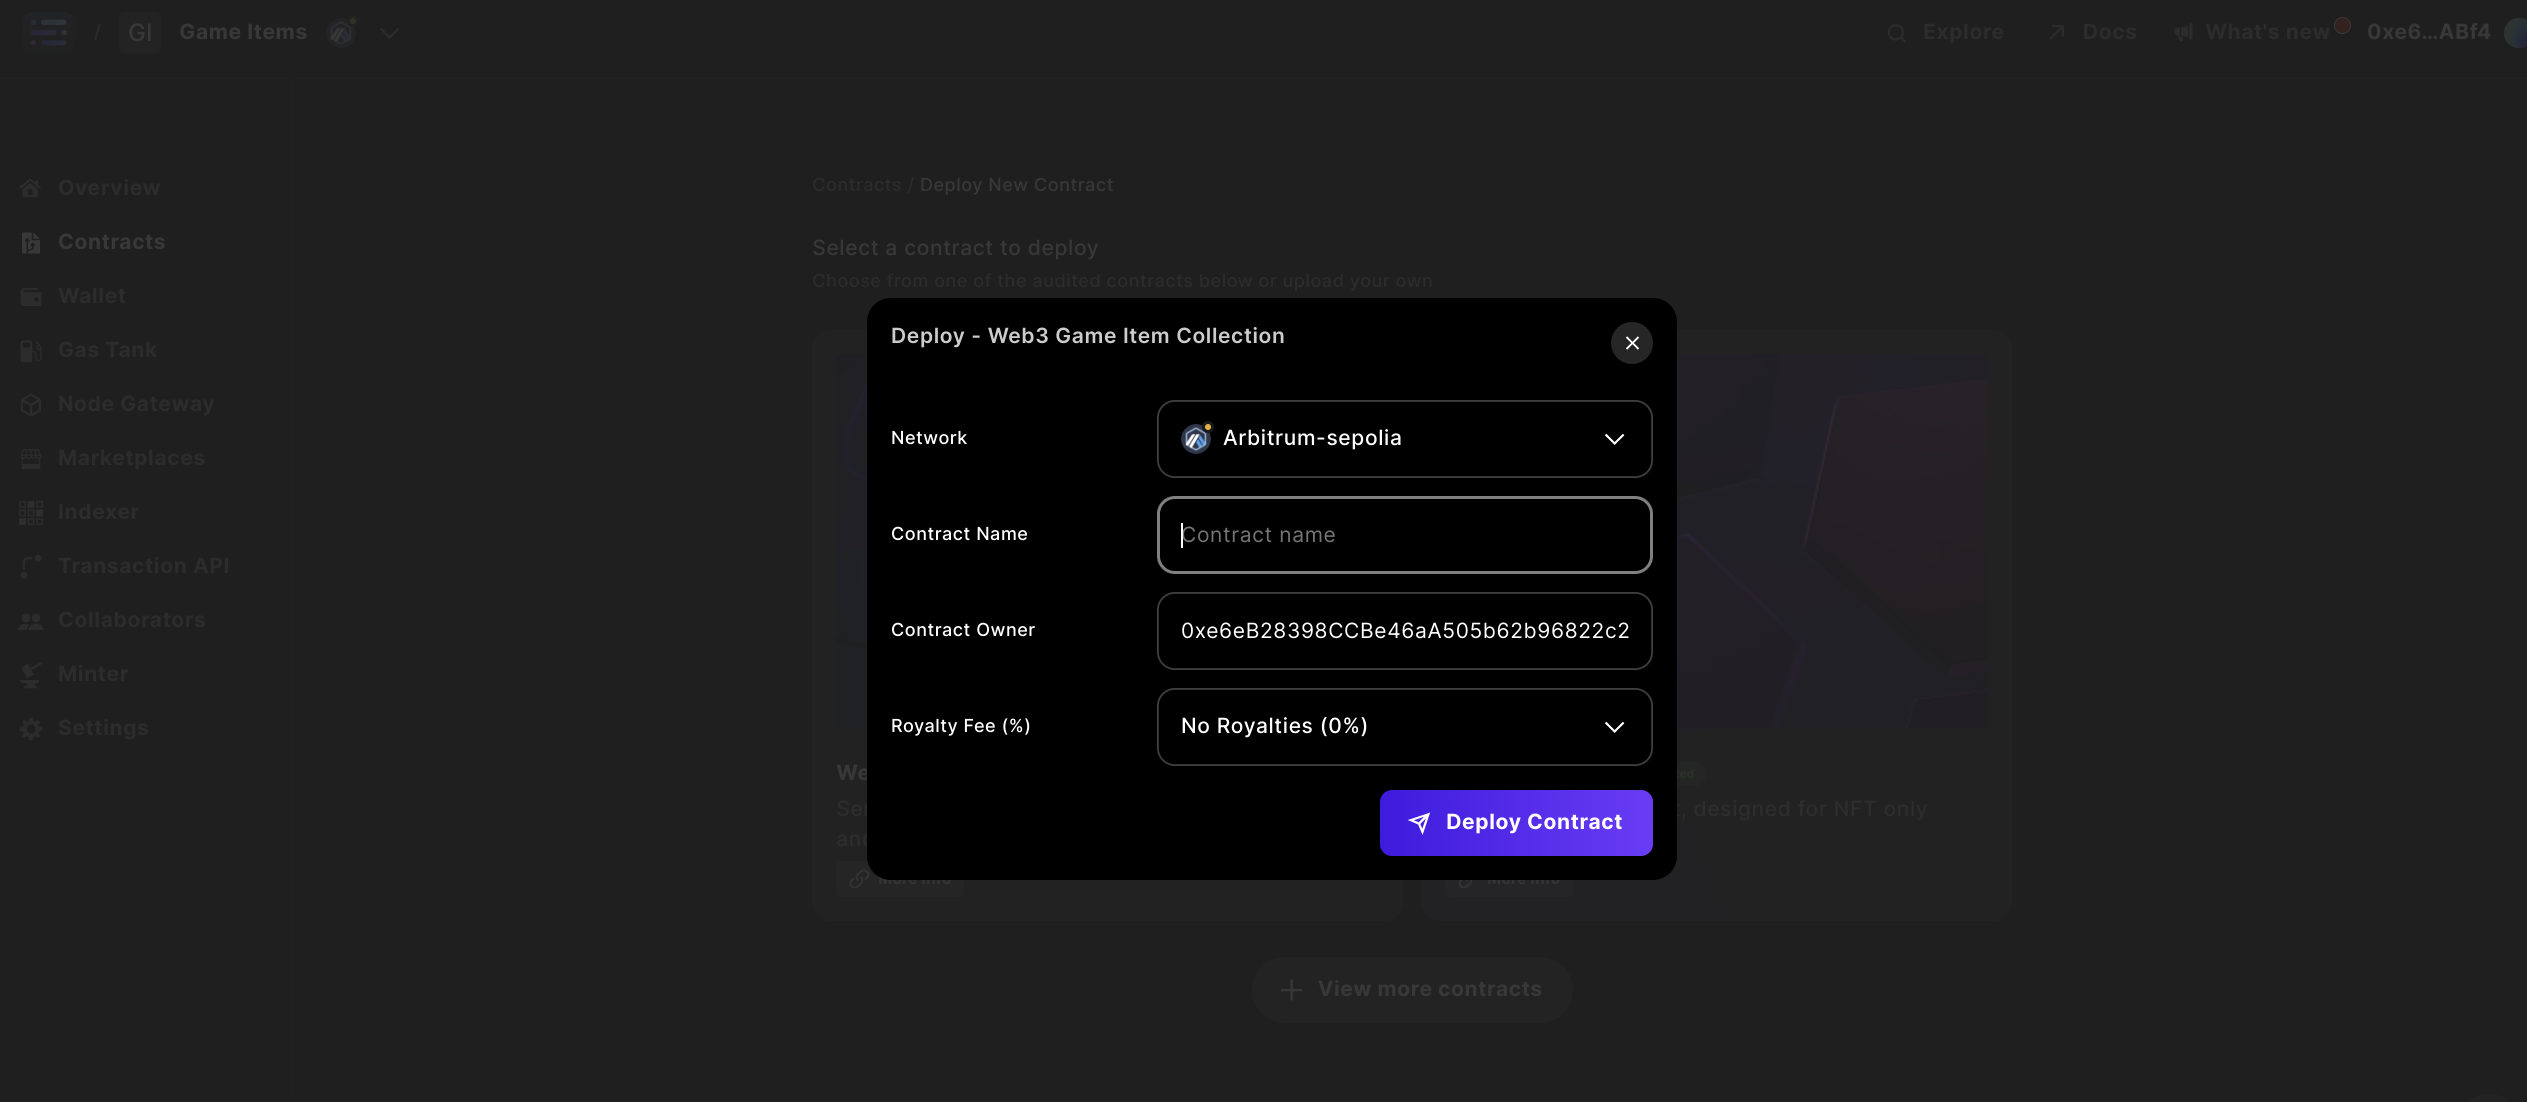 Note:
Changing the `name` later will update it across the Sequence stack, but popular explorers will not reindex the information. Your initial entry will remain in these systems.
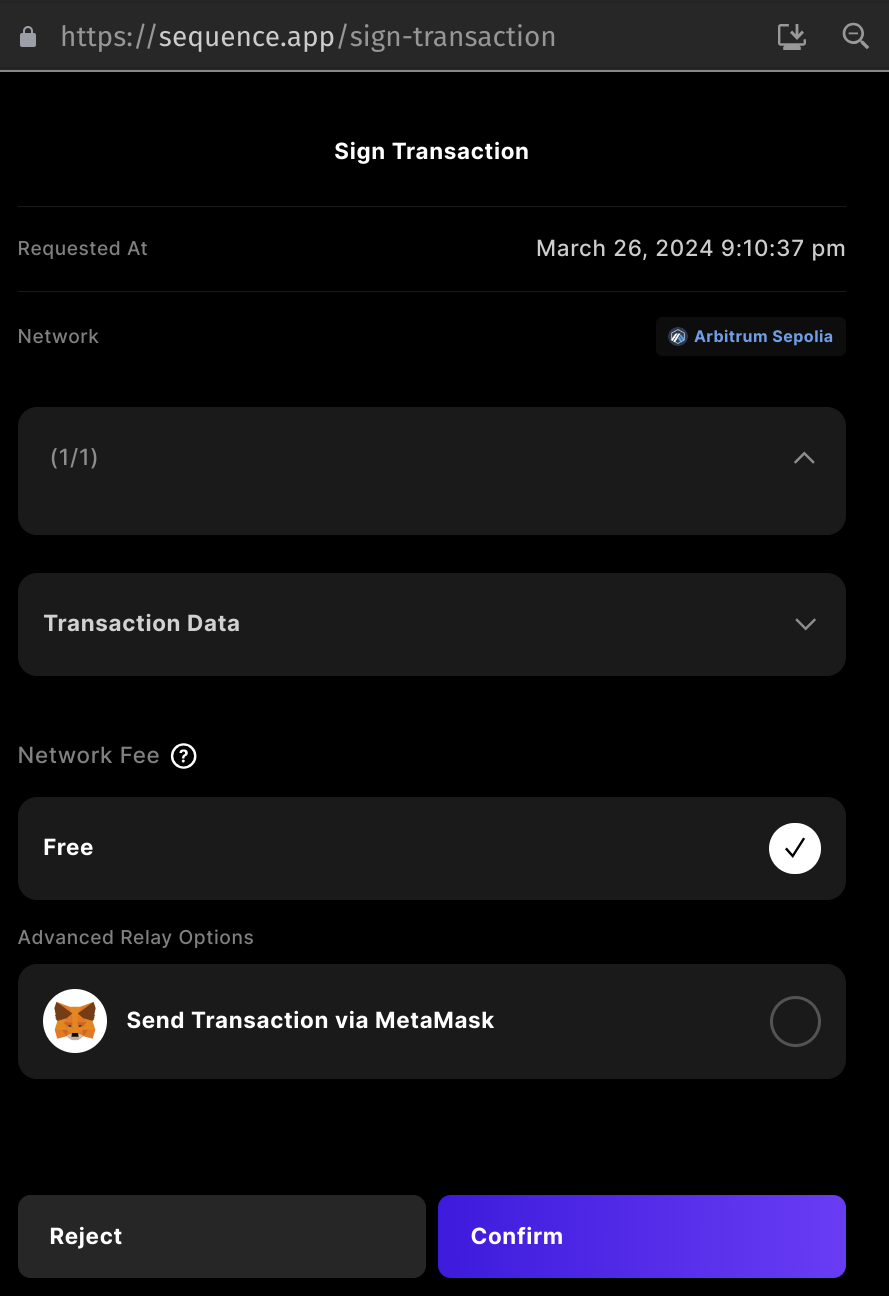
## Step 4: Deploy your contract
Deploy your contract via the popup window at [http://sequence.app/sign-transaction](http://sequence.app/sign-transaction), and confirm by signing the message.
Note:
Changing the `name` later will update it across the Sequence stack, but popular explorers will not reindex the information. Your initial entry will remain in these systems.
## Step 4: Deploy your contract
Deploy your contract via the popup window at [http://sequence.app/sign-transaction](http://sequence.app/sign-transaction), and confirm by signing the message.
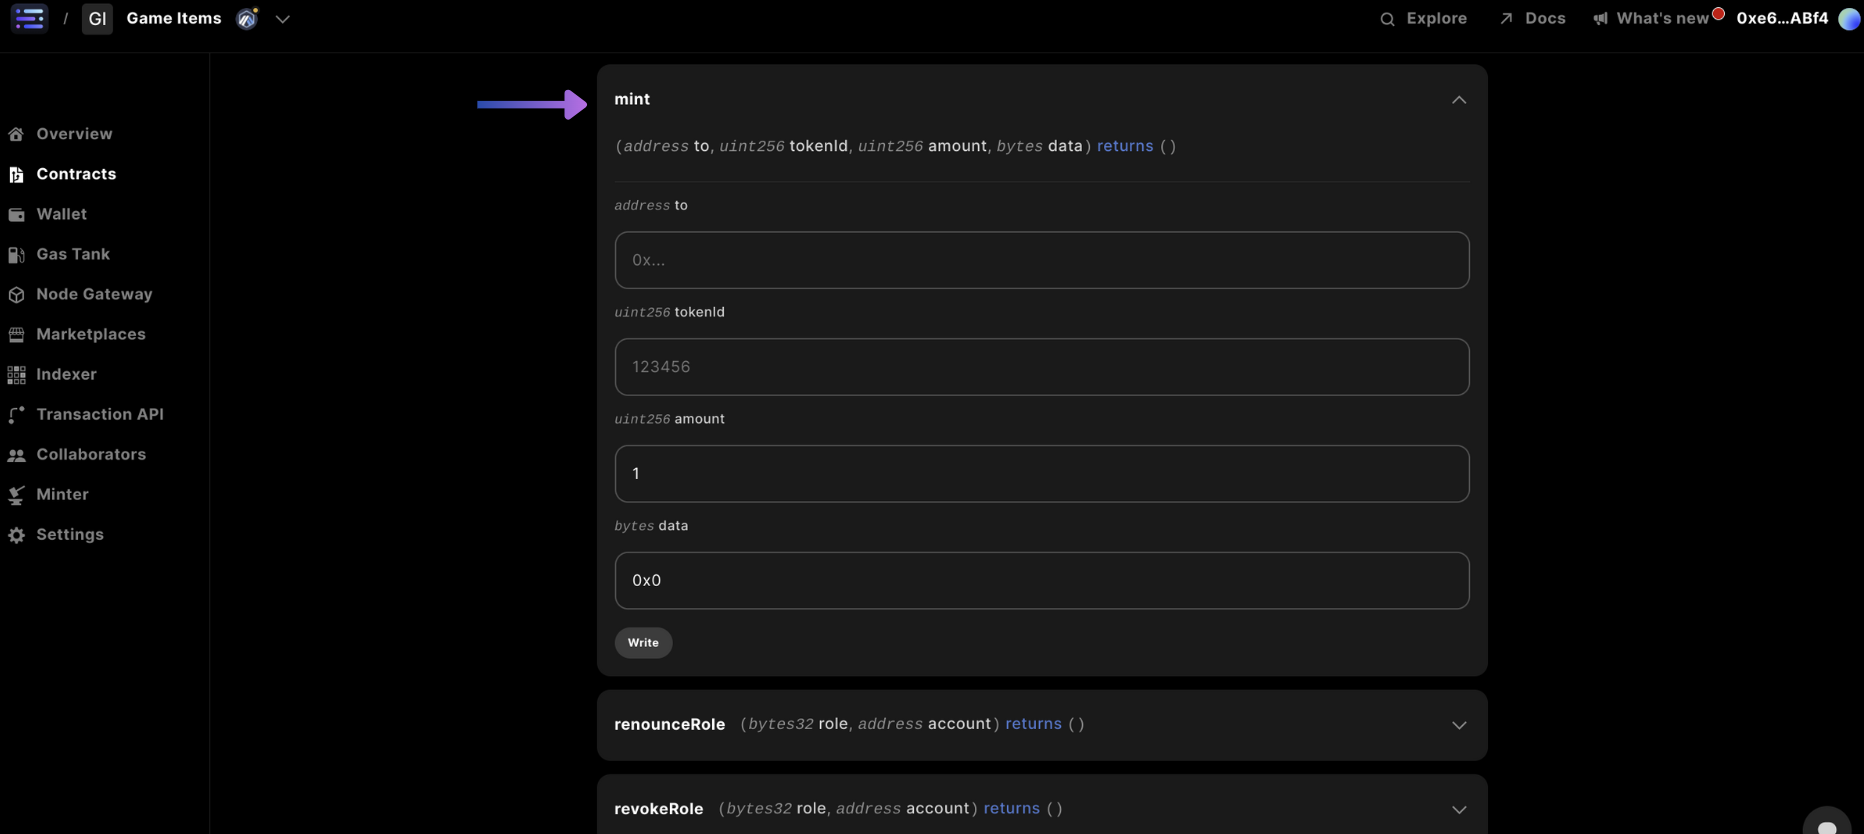
 ## Step 5: Mint tokens to your wallet address
Navigate to the `mint` card in the `Write Contract` section and input the `to` being the wallet address you would like to receive the token to, the `tokenId` (typically starting at 0), and `amount` of tokens, and finally the `data` section you can just input `0x00`, which typically represent Additional data with no specified format.
## Step 5: Mint tokens to your wallet address
Navigate to the `mint` card in the `Write Contract` section and input the `to` being the wallet address you would like to receive the token to, the `tokenId` (typically starting at 0), and `amount` of tokens, and finally the `data` section you can just input `0x00`, which typically represent Additional data with no specified format.
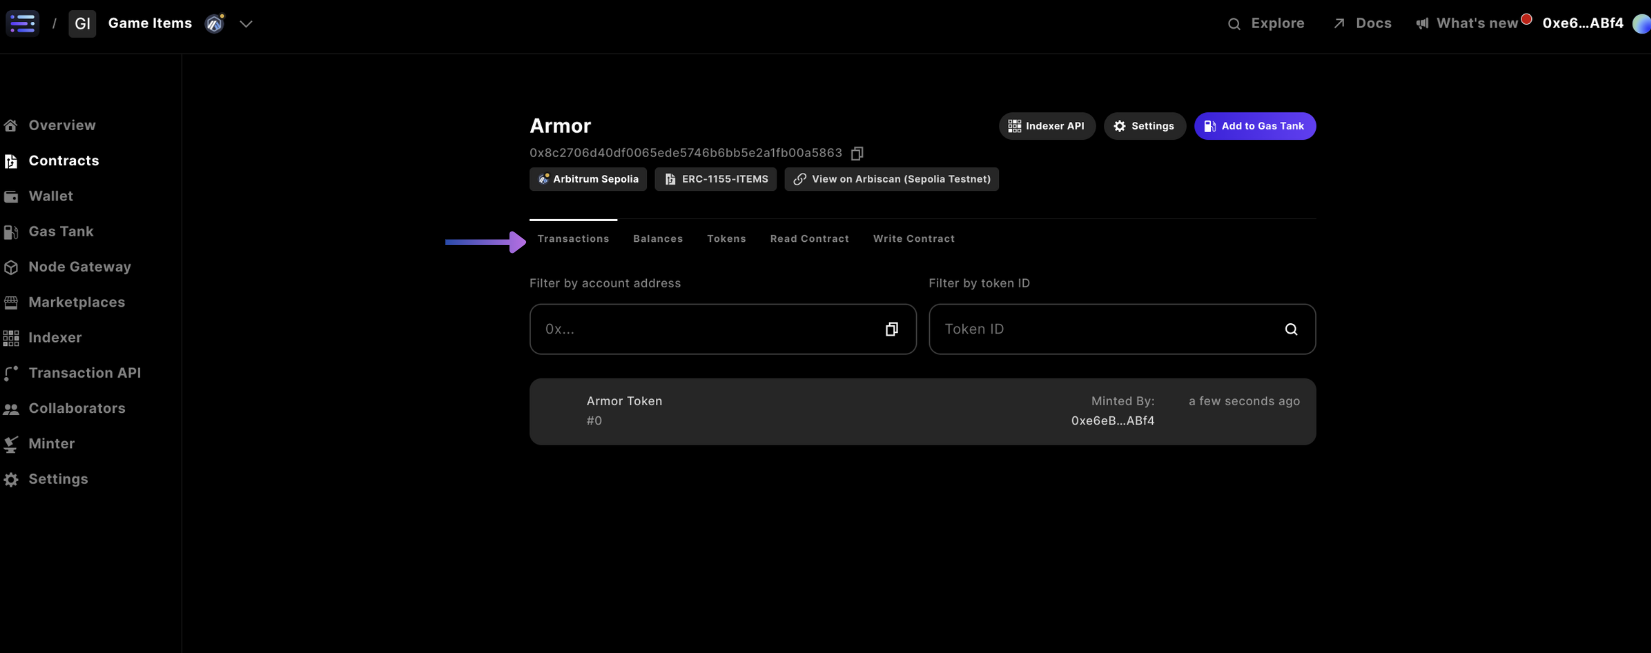
 ## Step 6: Confirm your minted collectible
And you're done!
You can view the transactions submitted to the blockchain for your wallet address in the `Transactions` tab navigation
## Step 6: Confirm your minted collectible
And you're done!
You can view the transactions submitted to the blockchain for your wallet address in the `Transactions` tab navigation